
1. When Should You Remove an Old Bathroom Vanity?
You should remove an old bathroom vanity when the cabinet has water damage, no longer meets your storage needs, or needs to be replaced during a bathroom renovation. Knowing when to replace it can help you avoid unnecessary repairs and prepare the space for a better-fitting unit.
Look for signs such as swollen cabinet panels, peeling finishes, loose drawers, or a persistent musty smell beneath the sink. For example, if a small leak has caused the cabinet base to soften, replacing the vanity may be more practical than repairing damaged materials.
Removal also makes sense when changing from a single-sink vanity to a double-sink design or updating an outdated bathroom. Before starting, check the cabinet’s condition, measure the available space, and inspect the plumbing connections to plan the job properly.
Table of Contents
2. What Tools and Materials Do You Need to Remove a Bathroom Vanity?
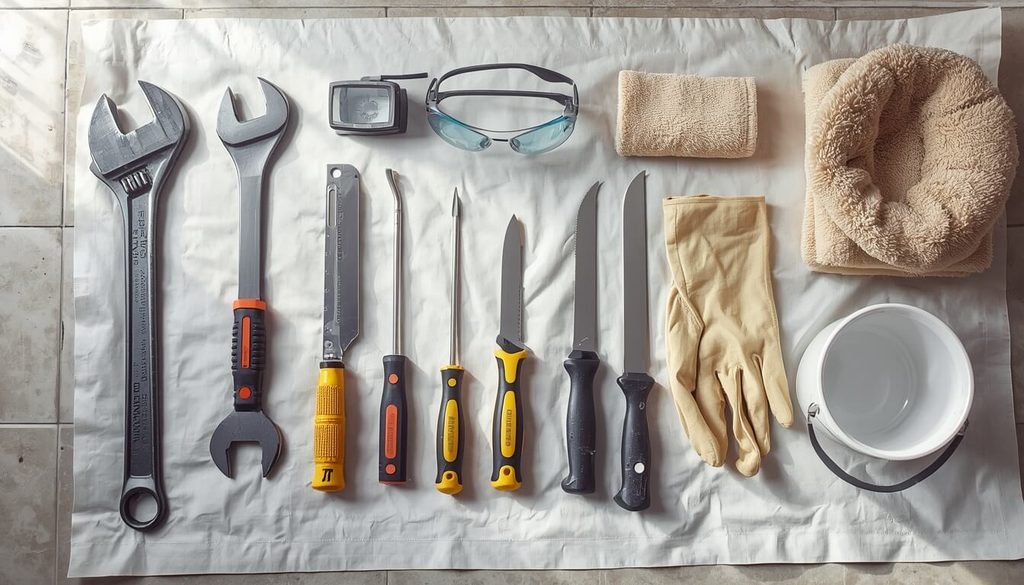
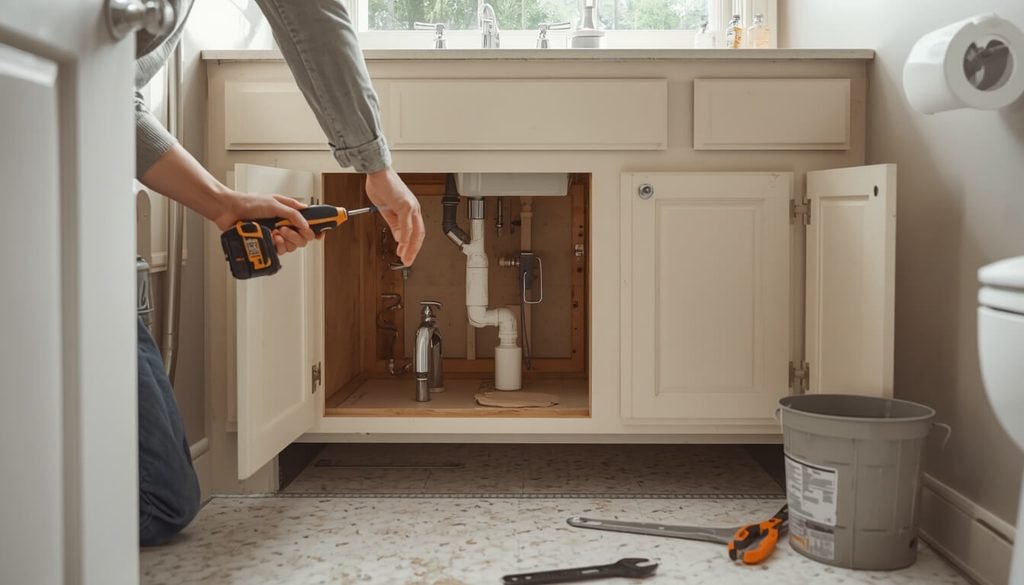
To remove a bathroom vanity safely, gather the right tools before you begin. An adjustable wrench, screwdriver, utility knife, bucket, safety glasses, work gloves, and pry bar will help you disconnect the plumbing and remove the cabinet without unnecessary damage. If you also plan to replace the vanity, see our guide to installing bathroom vanity plumbing for guidance on the water supply lines and drain connections.
Essential Tools for Vanity Removal
- Adjustable wrench: Loosens water supply line fittings and drain connections beneath the sink.
- Screwdriver or drill: Removes the screws holding the vanity cabinet to the wall and helps detach doors or drawers.
- Utility knife: Cuts through caulk or silicone sealant around the countertop and cabinet edges.
- Bucket and towels: Catch leftover water when disconnecting the sink drain and P-trap.
- Safety glasses and work gloves: Protect your eyes and hands from sharp edges, loose debris, and damaged materials.
- Pry bar and putty knife: Help loosen stubborn cabinet edges and separate sealed surfaces carefully.
Additional Supplies That Make the Job Easier
Keep a flashlight nearby so you can see connections inside a dark vanity cabinet. A tape measure helps you record the existing cabinet dimensions before choosing a replacement. Painter’s tape, a drop cloth, and a small container for screws can also keep the bathroom organized.
For example, if you are removing a 36-inch vanity, you may find several wall screws hidden behind drawers or near the cabinet’s upper corners. A flashlight and screwdriver make these fasteners easier to locate before you pull the unit away from the wall.
One important safety step: Turn off the hot and cold water supply valves before loosening any plumbing fittings. If a shutoff valve is stuck or leaking, address that problem before continuing. Having your tools ready makes learning how to remove bathroom vanity cabinets easier and helps prevent avoidable interruptions.
3. How Do You Prepare the Bathroom Before Removing the Vanity?
Prepare the bathroom by clearing the work area, protecting the floor, emptying the vanity, and shutting off the water supply. These steps help prevent water spills, damaged surfaces, and delays during cabinet removal.
Clear the Work Area and Protect the Floor
Remove toiletries, cleaning products, towels, and other items from the countertop and cabinet. Take out the drawers if possible, and remove the cabinet doors if they make the vanity harder to handle. Keep children and pets away from the work area.
Cover the floor with a drop cloth or thick towels, especially around the sink and cabinet base. Place a bucket beneath the plumbing connections to catch leftover water. If the bathroom has tile flooring, protect it from dropped tools or heavy countertop edges.
Turn Off the Water Supply
Locate the hot and cold shutoff valves beneath the sink and turn them clockwise to close them. Open the faucet briefly to release pressure and check whether the water stops flowing.
If a valve is stuck, leaking, or fails to stop the water, do not force it. Have the problem addressed before disconnecting the supply lines. You should also know where the bathroom’s main water shutoff is located in case a plumbing connection leaks unexpectedly.
Check the Plumbing and Cabinet Attachments
Use a flashlight to inspect the space beneath the sink. Look for flexible supply lines, the drainpipe, the P-trap, and any visible signs of corrosion or water damage. Check around the cabinet edges for caulk that may need cutting and locate the screws securing the vanity to the wall.
For example, a vanity that has been in place for ten years may have hardened silicone along the countertop and hidden screws behind its drawers. Identifying these details early can help you avoid pulling against attached surfaces and damaging the drywall. If you notice swollen panels or moisture damage, read our guide on whether MDF is suitable for a bathroom vanity to understand how water exposure can affect cabinet materials.
Before moving on, make sure the cabinet is empty, the floor is protected, and the water supply is off. Proper preparation makes the next steps—disconnecting the sink plumbing and removing the countertop—safer and easier to manage.
4. How Do You Disconnect the Plumbing Under a Bathroom Vanity?
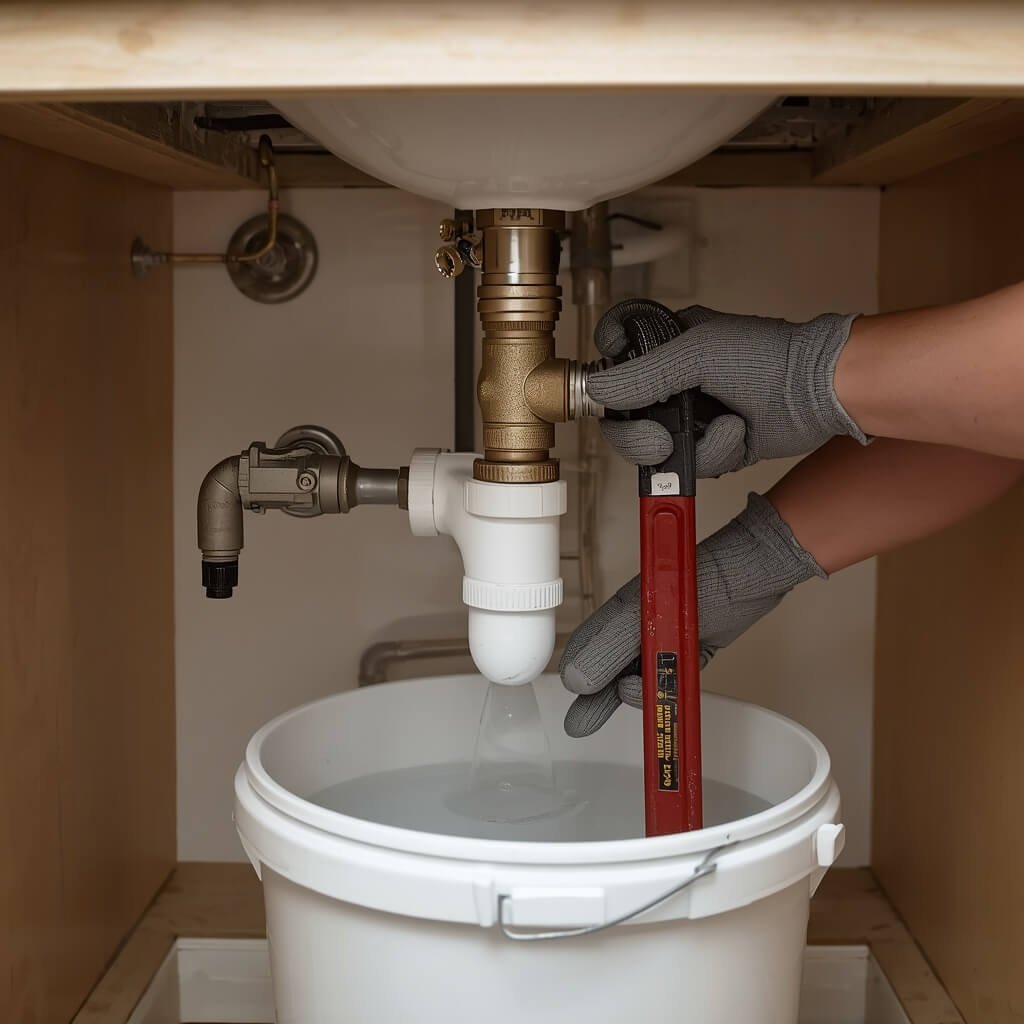
Disconnect the plumbing by closing the water supply valves, removing the faucet supply lines, and separating the sink drain from the P-trap. Work slowly and keep a bucket underneath the connections to catch trapped water and prevent spills.
Turn Off the Water and Disconnect the Supply Lines
Confirm that the hot and cold shutoff valves beneath the sink are fully closed. Turn on the faucet to release any remaining pressure, then place a small bucket beneath the water connections.
Use an adjustable wrench to loosen the nuts connecting the flexible water supply lines to the faucet or shutoff valves. Keep a firm grip on the fittings and turn them gently to avoid twisting the pipes. If a connection is badly corroded or a valve begins turning with the pipe, stop rather than forcing it.
Once disconnected, move the supply lines out of the way. If a valve continues leaking after being closed, have it repaired before proceeding.
Remove the P-Trap and Drain Connections
The P-trap is the curved pipe beneath the sink that holds water to block sewer gases from entering the bathroom. Place a bucket directly underneath it before loosening the slip nuts that connect the trap to the sink drain and wall drainpipe.
Many plastic P-traps can be loosened by hand, while older metal fittings may require adjustable pliers. Remove the trap carefully because it contains standing water and possibly debris. Empty it into the bucket and set it aside.
If the drain assembly is attached to the sink with a large retaining nut, check whether it must also be loosened before the sink or countertop can be removed. Avoid twisting the drainpipe inside the wall, as this can damage the connection.
Check for Additional Plumbing Attachments
Some bathroom vanities have extra components that need attention before removal. These may include a countertop-mounted faucet, a wall-mounted faucet, a pop-up drain linkage, or plumbing connections serving two sinks. If your vanity has a raised basin, our guide to bathroom vanities with bowl sinks explains common faucet and drain configurations.
For example, a double-sink vanity may have two drain assemblies connected to a shared drain line. Inspect both sides and disconnect every connection that prevents the cabinet or countertop from moving freely.
Keep small washers, nuts, and other reusable fittings together if you plan to reinstall any plumbing components. If you find cracked pipes, badly corroded fittings, or connections that cannot be removed safely, contact a licensed plumber.
Before moving to the next step, check that all supply lines and drain connections are detached. This prevents the plumbing from being pulled or broken when you lift the sink or remove the cabinet.
5. How Do You Remove the Bathroom Sink and Countertop?
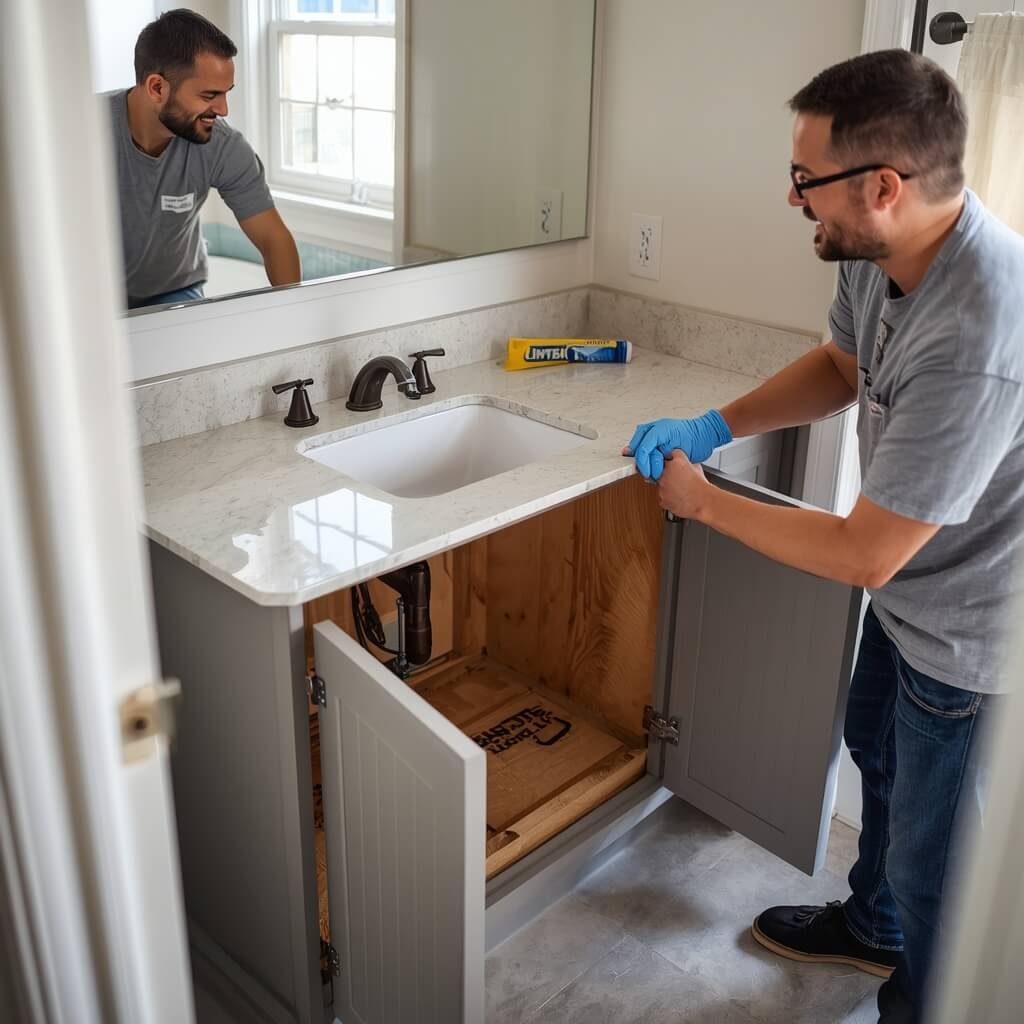
Remove the sink and countertop by cutting through the sealant, releasing the mounting clips or fasteners, and lifting the components carefully. The correct method depends on whether you have a drop-in sink, an undermount sink, a vessel sink, or a countertop with an integrated basin.
Remove a Drop-In Bathroom Sink
A drop-in sink sits inside a countertop opening, with its rim resting on the surface. After disconnecting the plumbing, use a utility knife to cut through the silicone caulk around the sink’s edge.
Look underneath the countertop for mounting clips that hold the sink in place. Loosen or remove these clips with the appropriate screwdriver or wrench. Once the sealant and clips are released, gently lift the sink out of the opening.
If the sink sticks, check for remaining caulk instead of pulling harder. Forcing it can chip the countertop or crack a porcelain basin.
Detach an Undermount Sink
An undermount sink is attached beneath the countertop using mounting clips, brackets, or adhesive. Because the sink hangs below the surface, support it before removing any fasteners.
Have another person hold the basin while you loosen the mounting clips. If adhesive secures the sink, separating it may require special tools and care, particularly with stone countertops. Do not strike the countertop or force a blade into the joint.
If the sink is heavy or the mounting system is difficult to access, consider hiring a professional. An unsupported basin can fall and cause injury or damage the cabinet.
Lift a Vessel Sink Safely
A vessel sink sits on top of the countertop and may be secured with silicone around its base. Cut through the visible sealant carefully and check for any additional mounting hardware.
Once the connection is released, lift the basin straight up with help if needed. Some vessel sinks are heavy glass, stone, or ceramic, so wear gloves and place the removed fixture on a padded surface.
If the basin is bonded firmly to the countertop, avoid twisting it aggressively. This can damage both the sink and the surface beneath it.
Remove the Countertop from the Vanity Cabinet
After removing the sink, inspect the countertop for screws, brackets, or adhesive connecting it to the cabinet. Cut through the caulk along the wall with a utility knife, keeping the blade angled away from the drywall.
Remove accessible fasteners and gently test whether the countertop can move. If it remains firmly attached, check for hidden screws or adhesive rather than prying forcefully.
Heavy countertops need extra care. A stone countertop measuring around 36 inches wide may still weigh enough to require two people to lift safely. Clear the path before moving it, wear protective gloves, and avoid lifting from weak edges. If the material is particularly heavy, leave the removal to an experienced installer.
Handle an Integrated Sink and Countertop
Some vanities have a sink molded directly into the countertop. In this design, the basin and surface form one piece, so there may be no separate sink to remove. For more information about this design, see our guide to cultured marble vanity tops with an integral sink.
After disconnecting the plumbing and cutting through the wall sealant, locate the countertop’s mounting screws or brackets. With another person supporting the unit, release the fasteners and lift the entire piece from the cabinet.
Do not assume that every countertop is attached in the same way. Check the underside and cabinet edges before lifting.
Once the sink and countertop are removed, inspect the exposed cabinet for hidden fasteners and signs of water damage. This makes the next stage—detaching the vanity cabinet from the wall—easier and helps you prepare the space for a replacement.
6. How Do You Detach and Remove the Vanity Cabinet?
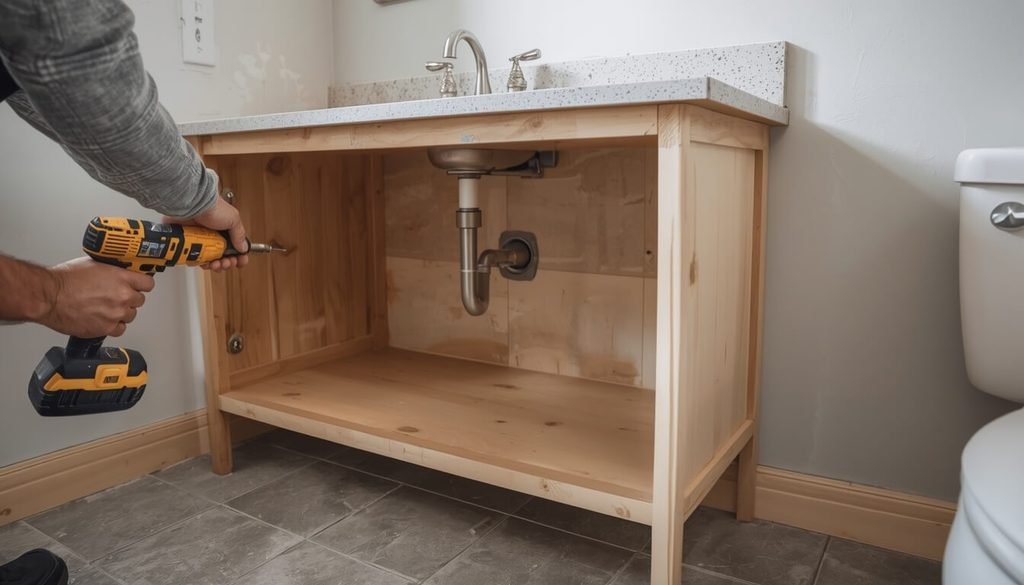
To remove the vanity cabinet, locate and remove the screws securing it to the wall, cut through any remaining caulk, and pull the cabinet away carefully. Make sure the countertop, sink, and plumbing connections have already been removed or safely disconnected before moving the cabinet.
Step 1: Locate the Wall Screws and Fasteners
Open the cabinet doors and inspect the inside back panel and upper corners. Most bathroom vanity cabinets are secured to wall studs with screws or mounting brackets. Some units may also have fasteners along the sides or bottom.
Use a flashlight to find hidden screws, especially behind drawers or near the cabinet’s top rail. If the cabinet has a separate backsplash or side panels, check whether they have additional attachments.
Step 2: Remove the Screws and Brackets
Use a screwdriver or drill to remove the fasteners connecting the cabinet to the wall. Keep the cabinet steady while loosening the final screws, because the unit may shift once its support is removed.
Follow these precautions:
- Ask someone to steady the cabinet while you remove the last fasteners.
- Keep the screws and brackets in a container if you plan to reuse the vanity.
- Check for additional screws before attempting to move the cabinet.
- Avoid pulling against fasteners that have not been removed.
If a screw spins without coming out or appears badly rusted, stop and determine how to release it without damaging the surrounding wall.
Step 3: Cut Through the Remaining Caulk
Run a utility knife carefully along the joint where the cabinet meets the wall. Older vanities may have silicone sealant along the sides or a bead of caulk near the floor.
Cut only through the sealant, keeping the blade away from your hands and avoiding deep cuts into the drywall. If paint or caulk holds the cabinet tightly against the wall, gently separate the joint with a putty knife.
Removing the sealant first helps prevent torn drywall paper and chipped paint when the cabinet moves.
Step 4: Pull the Cabinet Away from the Wall
Once the screws and sealant are removed, gently pull the vanity forward. If it does not move, check for hidden fasteners, adhesive, or a connection you may have missed.
For example, a 36-inch bathroom vanity may fit tightly between two walls. Pulling one side too hard can damage the drywall or crack a nearby tile. Move the cabinet evenly, and ask another person to help guide it through the available space.
If the cabinet remains stuck, stop and inspect the edges instead of using excessive force. A small pry bar can help loosen a stubborn joint, but place a thin protective piece of wood between the tool and the wall to reduce damage.
Step 5: Inspect the Area After Removal
After removing the cabinet, check the exposed wall and floor before preparing for a replacement.
Look for:
- Loose drywall or chipped paint.
- Water stains or softened flooring.
- Signs of mold or persistent moisture.
- Damaged plumbing connections.
- Nails, screws, or sharp debris left behind.
Clean the area and repair any damage before installing another unit. If the wall behind the sink shows moisture damage, our guide to bathroom vanity backsplash options explains how a backsplash can help protect the wall from future splashes.
Practical tip: If you are learning how to remove a bathroom vanity for the first time, take photos of the cabinet attachments and plumbing layout before starting. These pictures can help you understand the original setup when planning the replacement.
7. What Should You Check After Removing a Bathroom Vanity?
After removing the cabinet, inspect the wall, floor, plumbing connections, and surrounding surfaces before installing a replacement. Finding hidden damage early helps prevent future leaks, cabinet problems, and extra repair costs.
Check the Wall for Damage
Look closely at the area where the vanity was attached. Removing old caulk or pulling away a cabinet can leave chipped paint, torn drywall paper, small holes, or loose wall material.
Small screw holes can usually be patched with suitable wall repair compound. If the drywall feels soft, crumbles when touched, or shows deep water stains, investigate further before covering it with a new cabinet.
For example, a dark patch behind a vanity may indicate an old plumbing leak rather than simple dirt. Repair the affected area and allow it to dry fully before installing the replacement.
Inspect the Floor for Moisture and Damage
Check the flooring beneath the old cabinet, especially around the sink drain and water supply lines. Look for swollen laminate, loose tiles, stained grout, soft subflooring, or a musty smell.
Pay attention to these warning signs:
- Soft flooring: May indicate moisture damage beneath the surface.
- Loose or cracked tiles: Could need repair before the new vanity is installed.
- Dark stains: May point to a past or ongoing leak.
- Persistent dampness: Requires further investigation to find the source.
Do not install a new cabinet over wet flooring or damaged subflooring. If the floor feels spongy or the damage extends beyond the exposed area, consult a qualified contractor.
Look for Mold and Hidden Water Damage
Bathrooms stay humid, so moisture trapped behind a vanity can remain unnoticed for a long time. Check for visible mold, peeling finishes, discolored wood, and musty odors.
A small, isolated surface spot may have a simple cause, but widespread growth or recurring moisture needs more attention. Avoid disturbing suspected mold over a large area, and seek professional guidance if the affected material is extensive or the source is unclear.
Most importantly, fix the leak or moisture problem before putting a new vanity in place. Otherwise, the same damage may return. The U.S. Environmental Protection Agency’s guide to mold, moisture, and your home explains why controlling moisture and addressing water problems are important for preventing recurring mold growth.
Check the Plumbing Connections
Examine the shutoff valves, supply lines, drainpipe, and P-trap for corrosion, cracks, loose fittings, or signs of leaking. If you plan to reuse the existing plumbing, make sure the connections are in suitable condition.
If the new vanity has a different height or sink arrangement, the drain and supply lines may need adjustment. A double-sink cabinet, for example, can require additional plumbing work compared with a standard single-sink model.
Have a licensed plumber assess damaged pipes or faulty shutoff valves rather than forcing old fittings into a new installation.
Prepare the Space for a Replacement
Before buying or installing another cabinet, measure the available width, height, and depth. Check the location of the wall studs, water supply lines, and drain opening so the replacement fits without unnecessary changes.
Also make sure the wall and floor are clean, dry, and ready for installation. Repair loose drywall, remove leftover caulk, and clear away screws or debris.
A final inspection now can save time later. Once the surface is sound and the plumbing is ready, you can choose a replacement vanity that fits the bathroom and meets your storage needs.
8. What Common Mistakes Should You Avoid When Removing a Bathroom Vanity?
Avoid rushing the removal process, forcing stuck fittings, or pulling the cabinet away before removing all fasteners. Careful preparation helps prevent water leaks, damaged drywall, broken fixtures, and unnecessary repair costs.
Forgetting to Turn Off the Water Supply
Always close the hot and cold shutoff valves before disconnecting the faucet supply lines. If you skip this step, water can spill into the cabinet and onto the bathroom floor.
After closing the valves, turn on the faucet briefly to check that the water has stopped flowing. If a shutoff valve is stuck or continues leaking, have it repaired before proceeding.
Pulling the Cabinet Before Removing All Screws
One common mistake is trying to move the vanity while wall screws, mounting brackets, or adhesive still hold it in place. Pulling too hard can split the cabinet frame, damage the drywall, or loosen nearby tiles.
Before moving the cabinet:
- Check the inside back panel for mounting screws.
- Inspect the upper corners and sides for hidden fasteners.
- Cut through the caulk along the wall and cabinet edges.
- Confirm that the plumbing connections are completely detached.
If the cabinet will not move with gentle pressure, stop and look for an attachment you may have missed.
Damaging the Wall with a Pry Bar
Using excessive force to separate the cabinet from the wall can tear drywall paper or leave deep dents. This often happens when old caulk or paint has bonded the vanity to the surrounding surface.
Cut through the sealant with a utility knife first. If you need a pry bar, place a thin piece of scrap wood between the tool and the wall to spread the pressure. Work slowly rather than trying to loosen the entire cabinet at once.
Lifting a Heavy Countertop Alone
Stone, quartz, and solid-surface countertops can be difficult to handle without help. Even a countertop from a 36-inch vanity can be heavy enough to cause back injuries or damage the floor if dropped.
Ask another person to help lift and carry the countertop. Clear the path beforehand and wear suitable gloves. If the countertop is unusually heavy, firmly bonded, or difficult to reach, hire an experienced professional rather than risking injury.
Ignoring Hidden Water Damage
Another mistake is installing a replacement cabinet immediately after removing the old one. Water stains, soft flooring, corroded plumbing, or a musty smell may indicate a problem that needs attention first.
Inspect the exposed wall and floor, repair damaged surfaces, and make sure the area is dry. If you find extensive mold or structural damage, seek professional help before continuing.
The best approach is to work in order: shut off the water, disconnect the plumbing, remove the sink and countertop safely, and then detach the cabinet. Following these steps makes the project easier to manage and reduces the chance of costly mistakes.
9. When Should You Hire a Professional to Remove a Bathroom Vanity?
Hire a professional when removing the vanity involves damaged plumbing, stubborn fittings, heavy countertops, suspected mold, or structural damage. A DIY approach can work for a simple cabinet, but some problems require the right tools and experience to avoid costly repairs.
Damaged Plumbing or Stuck Connections
Call a licensed plumber if the shutoff valves leak, drainpipes are cracked, or corroded fittings will not loosen safely. Forcing an old connection can damage the pipe inside the wall and turn a small renovation into a larger plumbing repair.
Professional help is especially useful when:
- The water supply cannot be shut off completely.
- A drain connection is badly rusted or damaged.
- Pipes move when you loosen the fittings.
- The replacement vanity requires relocating plumbing.
Heavy Stone or Quartz Countertops
Granite, quartz, and other stone countertops can be difficult to lift without help. Some are also attached with strong adhesive or hidden mounting brackets.
For example, removing a stone countertop from a 48-inch double-sink vanity may require two or more people, depending on its weight and installation. A countertop installer can assess the attachment method and remove it without damaging the surrounding cabinets, walls, or floor.
Suspected Mold or Serious Water Damage
Seek professional advice if you discover extensive mold, persistent moisture, or a soft bathroom floor beneath the old cabinet. These signs may point to a long-term leak or damage hidden behind the vanity.
Do not cover the affected area with a replacement cabinet before finding the source of the moisture. Depending on the damage, you may need a qualified contractor, plumber, or mold remediation specialist.
Structural Problems or Difficult Cabinet Removal
Get help if the cabinet appears attached to unusual wall supports, surrounding tiles begin to loosen, or the vanity cannot be moved after all visible fasteners have been removed.
A professional can identify hidden attachments and determine whether removing the cabinet could damage the wall or flooring. This is particularly important in older bathrooms where previous repairs may have left unexpected connections.
How to Decide Between DIY and Professional Help
Before starting, consider the following points:
- DIY removal: Suitable when the cabinet is accessible, the plumbing works properly, and the sink and countertop can be handled safely.
- Plumber: Best for leaking shutoff valves, damaged pipes, or plumbing changes.
- Countertop installer: Helpful for heavy stone surfaces or strongly bonded sinks.
- Contractor: Appropriate for damaged flooring, wall repairs, or larger bathroom renovation work.
If the job becomes more complicated than expected, stopping to get professional help is often the safer and more practical choice. Once the old vanity is removed and any underlying problems are repaired, you can prepare the bathroom for a replacement that fits your space and plumbing.
Conclusion: How to Remove a Bathroom Vanity Safely and Efficiently
Learning how to remove bathroom vanity cabinets starts with proper preparation, shutting off the water, and disconnecting the plumbing carefully. Remove the sink and countertop safely, then detach the cabinet screws before pulling the unit away from the wall.
Take your time, especially when handling heavy countertops or checking for hidden water damage. If you find leaking pipes, extensive mold, or damaged flooring, seek professional help before installing a replacement. When you are ready for the next stage, follow our guide to bathroom vanity installation costs to plan for labor, plumbing, and any additional repairs. A careful removal process leaves your bathroom ready for renovation.
FAQs
1. How hard is it to remove a bathroom vanity?
Removing a bathroom vanity is usually a moderate DIY task. It becomes easier with basic tools, but plumbing connections, heavy countertops, and stubborn adhesive can make removal more difficult.
2. How is a bathroom vanity attached to the wall?
Most bathroom vanities are secured to wall studs with screws or mounting brackets. Caulk or adhesive may also seal the cabinet or countertop against the wall.
3. How do you remove a bathroom vanity countertop?
First, disconnect the sink plumbing and remove any sink clips. Cut through the caulk around the countertop, release its fasteners, and carefully lift it off with help if it is heavy.
4. How much does it cost to remove a bathroom vanity?
The cost depends on the vanity size, countertop weight, plumbing, and local labor rates. Simple removal may cost around 100–300 for labor, while complex jobs can cost more. Get local estimates before starting.
5. How do you remove an old bathroom vanity and install a new one?
Shut off the water, disconnect the plumbing, remove the old sink and countertop, and detach the cabinet. Position and secure the new vanity, reconnect the plumbing, seal the edges where needed, and check for leaks.
6. Do you need a plumber to replace a bathroom vanity?
Not always. You can often replace a vanity yourself if the plumbing connections stay in the same locations and are in good condition. Hire a plumber if pipes need relocating or connections are damaged or leaking.
About the Author
Bilal Khan is interested in writing practical, informative content about bathroom vanities, home improvement, and interior design. He focuses on sharing clear guidance and useful tips to help readers make informed decisions about their homes.