
Introduction
Ever noticed water spots creeping up the wall behind your bathroom sink? That’s usually a sign your vanity is missing proper protection. A bathroom vanity backsplash solves this simple but common problem, shielding your wall from daily splashes, soap residue, and moisture buildup. In this article, we’ll walk through what it is, the different styles and materials available, and how to choose one that actually fits your space and budget.
Table of Contents
Why Every Bathroom Vanity Needs a Backsplash
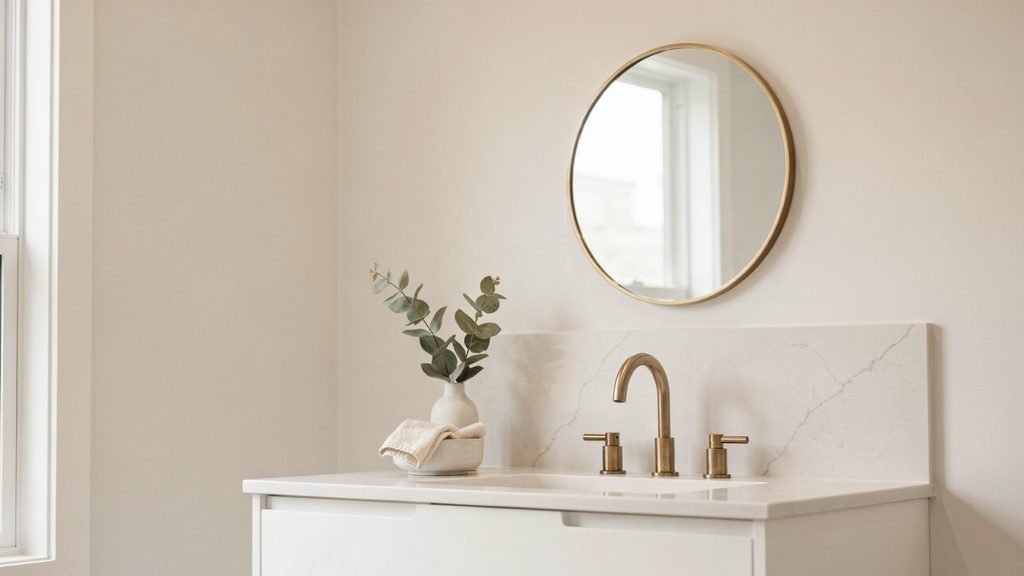
A bathroom vanity backsplash protects your wall from daily water splashes, soap residue, and moisture buildup that would otherwise damage drywall or paint over time. Without one, even a small sink area takes a beating every single day.
Think about how many times a faucet gets used in one household — brushing teeth, washing hands, rinsing makeup brushes. Each splash sends tiny water droplets onto the wall behind the sink. On its own, one splash means nothing. But repeated daily over months, that moisture seeps into drywall, softens paint, and eventually leads to mould spots or peeling — something homeowners in humid states like Florida or Texas run into more often than they’d expect.
A backsplash acts as a barrier between the vanity countertop and the wall, and it handles more than one job at once:
- Blocks moisture damage – Water-resistant materials like tile or quartz stop splashes from soaking into drywall
- Prevents mold and mildew growth – Especially important in humid climates or bathrooms with poor ventilation
- Makes daily cleaning faster – Toothpaste splatter, soap scum, and hard water spots wipe off in seconds
- Protects paint and wall finish – No more peeling or discolouration near the sink area
- Adds long-term value – Reduces the need for repainting or wall repairs over the years
Compare that to a painted wall, where the same daily splashes and stains soak into the surface and often need scrubbing or a fresh coat of paint to fix. A smooth backsplash surface — especially tile or quartz — simply doesn’t hold onto grime the same way.
Beyond function, a backsplash also protects your wall finish from long-term wear. Grout lines, cabinet edges, and countertop seams are common areas where water tends to collect — which is closely tied to why vanity height and countertop material selection matter just as much as the backsplash itself. Understanding the different parts and materials of a vanity can also help when planning the surrounding bathroom setup.
In short, a bathroom vanity backsplash isn’t just a design choice — it’s a practical layer of protection that saves both time and money on wall repairs down the line.
Types of Bathroom Vanity Backsplash Styles
There are three common bathroom vanity backsplash styles — full-height, standard 4-inch, and side splash — and each one fits a different budget, bathroom layout, and design goal.
Picking the right style isn’t just about looks. It depends on how much wall protection you actually need, how much you want to spend, and how the rest of your bathroom is designed. A quick example: a vanity with a single sink in a small powder room doesn’t need the same coverage as a double-sink vanity in a master bathroom that gets used multiple times a day.
Full-Height Backsplash
A full-height backsplash runs from the countertop all the way up to the mirror or cabinet, covering the entire wall space behind the vanity. This style offers the most protection against water damage, splashes, and moisture buildup, which makes it a smart choice for households with kids or anyone who wants low-maintenance walls.
It’s also the most design-forward option. Homeowners often use it to create a bold visual feature — think marble slabs, patterned tile, or a waterfall effect where the countertop material continues right up the wall. The tradeoff is cost, since more material and labor go into a full-height installation compared to shorter options.
Standard 4-Inch Backsplash
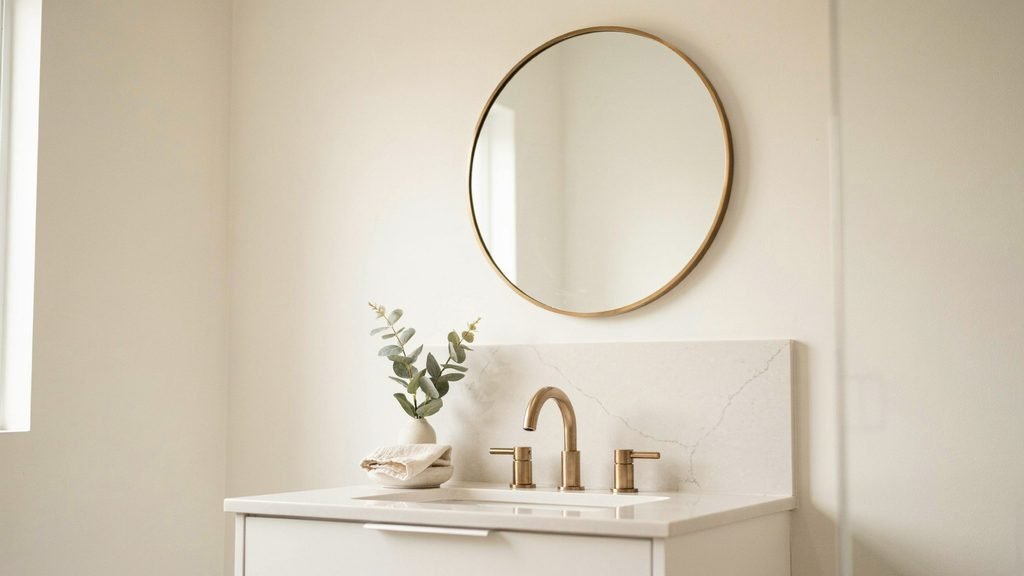
The 4-inch backsplash is the most common style found in American homes, and for good reason — it’s affordable, easy to install, and covers the most vulnerable splash zone directly behind the faucet. This is usually the built-in option that comes standard with pre-made vanity tops.
It works well in guest bathrooms, rentals, or budget renovations where full wall coverage isn’t necessary. The main limitation is that it doesn’t protect the wall above the 4-inch mark, so areas near the mirror can still be exposed to splashes from taller faucets or vigorous handwashing.
Side Splash
A side splash is a shorter vertical piece placed at the edges of the vanity, usually where the countertop meets a wall on either side. It’s often paired with a standard 4-inch backsplash to protect corners where water tends to pool or drip, especially in vanities positioned between two walls.
This style matters more than people expect in small bathrooms, where tight layouts mean water splashes sideways just as often as it splashes forward. Skipping the side splash in these setups is one of the most overlooked bathroom design mistakes, since it leaves corner walls exposed even when the main backsplash looks complete.
Choosing between these three styles ultimately comes down to matching wall protection with your vanity layout and countertop material — a decision that also plays into how well your backsplash coordinates with cabinet finishes and overall bathroom design.
Best Materials for a Vanity Backsplash (And What Homeowners Actually Choose)
Most homeowners end up choosing between four materials for a vanity backsplash — porcelain tile, quartz, marble, and laminate — and the right pick depends on your budget, how much upkeep you’re willing to do, and how long you plan to stay in the home.
There’s no single “best” material here. A young family in a starter home has very different needs than someone doing a luxury master bath remodel. What matters is matching the material to your daily habits, your climate, and how much maintenance you’re realistically going to keep up with. If you’re still learning the basics of vanity design and construction, understanding what a vanity is and how its main components work can also make it easier to choose the right backsplash material.
Porcelain and Ceramic Tile
Tile remains one of the most popular backsplash choices in American bathrooms, and for good reason. It’s water-resistant, easy to clean, and comes in dozens of patterns, sizes, and finishes. Porcelain specifically is denser than ceramic, which makes it more resistant to moisture and better suited for humid bathrooms that see heavy daily use.
- Affordable compared to natural stone
- DIY-friendly for smaller backsplash projects
- Grout lines need occasional resealing to prevent staining
The one downside is grout maintenance. Debris and bacteria can build up between tiles over time, so a light cleaning routine every few weeks keeps it looking fresh.
Quartz
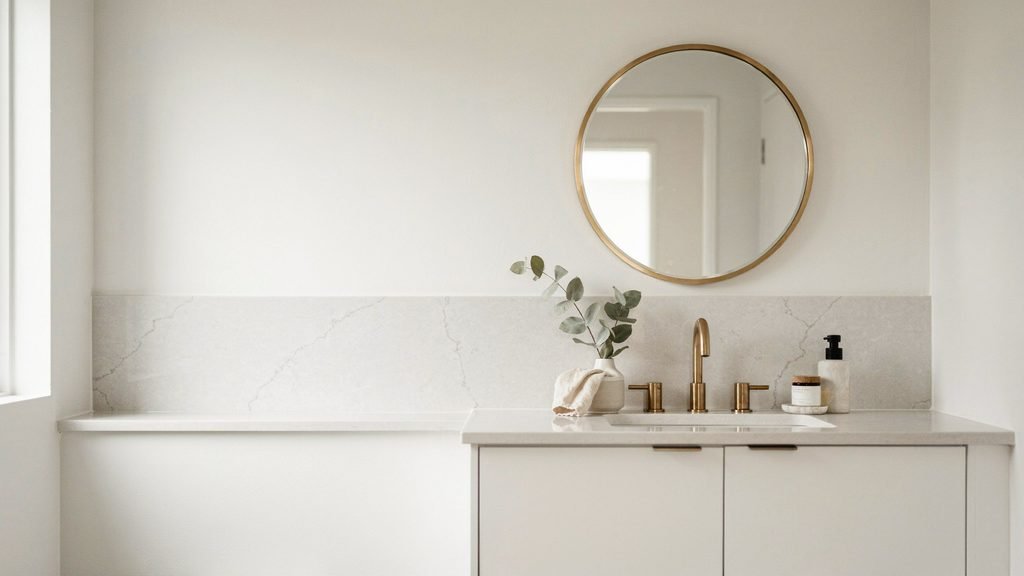
Quartz has become the go-to choice for homeowners who want a low-maintenance, seamless look. Because it’s engineered rather than cut from natural stone, quartz is non-porous, meaning it never needs sealing and resists both water damage and staining right out of the box.
A common real-world scenario: many homeowners now extend their quartz countertop straight up the wall as the backsplash, creating a seamless waterfall effect with zero grout lines to clean. This “slab backsplash” trend has grown especially popular in mid-range to upscale renovations because it looks custom without the upkeep of natural stone.
Marble
Marble is the luxury pick, and it’s easy to see why — the veining and soft color variation give a bathroom a spa-like feel that’s hard to replicate with manufactured materials. But marble is porous, which means it’s prone to staining from toothpaste, makeup, and acidic products if it isn’t sealed regularly.
This is where the E-E-A-T reality check matters: marble looks stunning in a guest bathroom or low-traffic powder room, but a busy family bathroom used multiple times a day is a tougher environment for it. Homeowners who love the marble look but want better day-to-day performance often choose engineered quartz or quartzite instead, since both mimic marble’s appearance with far less maintenance.
Laminate
Laminate is the most budget-friendly backsplash material, typically running around $30 per square foot installed. It’s made from layers of plastic bonded to a base board, and modern versions can convincingly mimic the look of marble or granite at a fraction of the price.
Laminate works well for rental properties, guest bathrooms, or quick budget renovations. The tradeoff is durability — it scratches more easily and generally doesn’t hold up as long as tile or quartz, especially in bathrooms with heavy daily use.
Which Material Should You Choose?
| Material | Water Resistance | Maintenance | Best For |
| Porcelain Tile | High | Low-Medium | Everyday family bathrooms |
| Quartz | Very High | Low | Busy vanities, seamless looks |
| Marble | Medium | High | Guest baths, low-traffic spaces |
| Laminate | Medium | Medium | Budget renovations, rentals |
Your material choice also ties directly into how well the backsplash coordinates with your countertop and vanity finish — something worth thinking through alongside cabinet color and hardware selection for a cohesive overall look.
How to Choose the Right Backsplash for Your Bathroom Size and Style
The right bathroom vanity backsplash depends mainly on two things — the size of your bathroom and how well the material matches your countertop and cabinet colour. Get those two right, and everything else in the design falls into place naturally.
Bathroom size plays a bigger role in this decision than most homeowners expect. A 40-square-foot powder room behaves very differently than a spacious primary bathroom, both in how light moves through the space and how much wall area you’re actually working with.
Choosing a Backsplash for Small Bathrooms
In smaller bathrooms, the goal is to avoid visual clutter while still protecting the wall. Busy patterns or dark, heavy materials can make a compact space feel even tighter.
- Light-colored tile or quartz keeps the space feeling open
- Glass tile reflects light and helps small bathrooms feel brighter
- A standard 4-inch backsplash avoids overwhelming a low-ceiling or narrow layout
- Avoid heavily veined marble, which can feel busy in a tight footprint
A common scenario here: a half-bath with a single vanity often looks better with a simple 4-inch backsplash in a soft, neutral tone rather than a full-height statement wall, which can make the room feel smaller instead of more finished.
Choosing a Backsplash for Large Bathrooms
Larger bathrooms, especially primary suites with double vanities, can handle bolder choices. Full-height backsplashes, dramatic veining, and larger tile formats all work well here because there’s enough surrounding space to balance them out.
- Full-height slabs create a strong visual anchor in double-vanity setups
- Bold patterns or natural stone read as intentional design, not overwhelming
- Larger format tiles reduce grout lines, giving a cleaner, more upscale look
Matching Backsplash to Countertop and Cabinet Color
Color coordination is where a lot of bathroom vanity backsplash projects go wrong. The backsplash doesn’t need to match the countertop exactly, but it does need to work with it.
A simple rule that works in most homes: if your countertop has movement or veining, keep the backsplash simpler so the two don’t compete visually. If your countertop is a solid, quiet color, that’s your opportunity to add texture or pattern through the backsplash instead.
Cabinet color matters just as much. Dark cabinets tend to pair well with lighter backsplash tones for contrast, while white or light cabinets give more flexibility to go bolder with the backsplash material. This same logic connects closely to overall vanity color selection, since backsplash, countertop, and cabinet finish all need to read as one cohesive design rather than three separate decisions.
Ultimately, choosing the right backsplash comes down to reading your space honestly — matching scale to room size and letting color coordination guide material choice — rather than picking a style just because it’s trending.
Installation Basics: What to Expect (DIY vs Hiring a Pro)
A bathroom vanity backsplash installation typically costs between $100 and $1,200 depending on material, with most homeowners spending around $200 to $600 for a standard project — and whether you DIY it or hire a pro mostly comes down to the material you choose and your comfort level with tile work.
Because a vanity backsplash is small compared to a kitchen project, it’s one of the more approachable bathroom upgrades to tackle yourself. Most bathroom backsplashes cover roughly 6 to 10 square feet, which is a fraction of the size of a typical kitchen backsplash. That smaller scale keeps both material costs and labor time manageable, even if you decide to hire someone.
What It Costs
Pricing depends heavily on material and installation method:
- Peel-and-stick or laminate options – roughly $1.50 to $5 per square foot, the cheapest route
- Standard ceramic or porcelain tile – around $8 to $15 per square foot installed
- Quartz or natural stone slab – $30 or more per square foot, often the priciest option
- Labor alone – typically $6 to $15 per square foot if you hire a professional
For a small 4-inch backsplash behind a single vanity, that often lands the total project cost under $300. A full-height slab backsplash in a double-vanity bathroom, on the other hand, can easily run into the four figures once material and labor are combined.
How Long It Takes
A basic tile backsplash installation usually takes a full day from prep to grouting, plus another 24 to 72 hours of curing time before the area can get wet again. Peel-and-stick or adhesive mat options are faster, often finishable in just a few hours since there’s no mixing or long curing wait.
When DIY Makes Sense
DIY works best when the project is small, the material is beginner-friendly, and the wall behind the vanity is already in good condition.
- Good DIY candidates: peel-and-stick tile, adhesive mat sheets, small 4-inch backsplashes, simple square-tile layouts
- Better left to a pro: full-height slab installs, natural stone that requires sealing, any layout involving plumbing or electrical work near the vanity, and bathrooms with uneven or damaged drywall
A common real-world scenario: a homeowner replacing an outdated 4-inch tile backsplash with a simple porcelain option can often finish the job in a weekend using basic tools and adhesive mats. But swapping in a full quartz slab that runs floor-to-ceiling usually calls for a professional, since precise cutting and a level installation matter more when the material is expensive and unforgiving of mistakes.
The Bottom Line on Installation
If you’re comfortable with basic home improvement tools and choosing a straightforward material, a vanity backsplash is one of the more realistic DIY bathroom projects out there. For anything involving natural stone, large slabs, or plumbing adjustments, hiring a professional protects both your investment and your timeline — which ties directly into overall vanity installation costs, since backsplash work is often bundled into a larger bathroom vanity replacement project.
Maintenance Tips to Keep Your Backsplash Looking New
Keeping a bathroom vanity backsplash looking new mostly comes down to three habits: wiping it down regularly, resealing grout once a year, and drying water off before it has a chance to sit and stain. None of this takes much time, but skipping it is what leads to dull, stained, or damaged surfaces down the road.
Most wear and tear on a backsplash isn’t caused by one big accident — it’s the slow buildup from daily use. Toothpaste splatter, hard water spots, and soap residue pile up quietly over weeks, and by the time it’s noticeable, it often takes real scrubbing to fix. A simple routine prevents that from ever building up in the first place.
Daily and Weekly Cleaning Routine
A quick wipe-down goes a long way toward keeping a backsplash looking fresh:
- Wipe daily with a damp microfiber cloth to remove toothpaste, soap scum, and water spots before they dry and set in
- Use a mild, pH-neutral cleaner weekly for tile, quartz, or laminate — harsh chemicals can dull the finish over time
- Avoid abrasive scrubbers on quartz and glass tile, since they can leave fine scratches that trap dirt
- Dry the surface after cleaning, especially around grout lines, to prevent water from sitting and evaporating slowly
This routine takes less than two minutes a day but saves hours of deep cleaning later. A common scenario: a family bathroom used by kids often sees the fastest buildup near the faucet, simply because that’s where splashing happens. Keeping the area dry and managing bathroom moisture levels can also help reduce conditions that encourage mold growth.
Sealing Grout to Prevent Staining
If your backsplash uses tile, grout maintenance is one of the most overlooked steps. Grout is porous, which means it absorbs water, soap, and grime unless it’s properly sealed.
- Reseal grout lines once a year for bathrooms with daily use
- Test if grout needs sealing by dripping a bit of water on it — if it soaks in instead of beading up, it’s time to reseal
- Use a grout brush with a mild baking soda paste for stubborn stains between resealing
Skipping this step is one of the most common reasons tile backsplashes start looking dingy within just a year or two, even when the rest of the bathroom is well maintained.
Preventing Water Stains and Long-Term Damage
Water stains form when moisture is left to sit and evaporate on a surface repeatedly, leaving behind mineral deposits from hard water. This is especially common in homes with hard water, which affects a large share of households across the U.S.
- Squeegee or wipe the backsplash after heavy use, like after washing hair products off at the sink
- Address any small cracks or chips immediately, since moisture can get underneath and cause bigger damage
- Use a water softener or filtered faucet aerator if hard water stains keep coming back despite regular cleaning
Staying ahead of small maintenance tasks protects the investment you made in your vanity backsplash and ties directly into overall bathroom upkeep, including how well your countertop and cabinet finishes hold up over the years.
Common Mistakes to Avoid When Picking a Vanity Backsplash
The most common mistakes homeowners make with a bathroom vanity backsplash are choosing the wrong height, picking a material that clashes with the countertop, and ignoring how well the material handles humidity. Each one seems minor during planning but becomes obvious — and annoying — once the bathroom is finished.
These mistakes usually aren’t about bad taste. They happen because backsplash decisions get made quickly, often as an afterthought once the countertop and cabinets are already chosen. Slowing down on this one detail can save homeowners from a redo that costs both time and money.
Choosing the Wrong Height
Height mistakes are one of the most frequent issues, especially with standard 4-inch backsplashes. A 4-inch height only protects the lowest section of wall, which means splashes from a taller faucet or a vigorous handwash can still land above it and hit bare drywall.
- Measure faucet height before deciding on backsplash height
- Consider a full-height or mid-height option for vanities with tall or waterfall faucets
- Don’t assume a builder-grade 4-inch backsplash is automatically enough protection
A common scenario: a homeowner upgrades to a taller, modern faucet during a remodel but keeps the original short backsplash, only to notice water marks creeping up the wall within a few months.
Mismatching Backsplash and Countertop Material
Choosing a backsplash that doesn’t visually connect with the countertop is another frequent misstep. This doesn’t mean everything needs to match exactly, but there should be some logical relationship in color, tone, or texture.
- Avoid pairing a heavily veined countertop with an equally busy backsplash pattern, since the two will compete instead of complementing each other
- Don’t choose backsplash tile in complete isolation — always view it alongside a countertop and cabinet sample first
- Skipping this step often means starting over once the full vanity area is installed and the mismatch becomes obvious
This is one of the easiest mistakes to prevent simply by requesting physical samples before finalizing a purchase, rather than relying on photos or showroom lighting alone.
Ignoring Humidity Resistance
Not every attractive material is built for a bathroom environment. Some homeowners fall in love with a material that looks great in photos but performs poorly in a humid, high-moisture space.
- Porous materials like unsealed natural stone absorb moisture and are prone to mold or staining without regular sealing
- Laminate and MDF-based products can swell or warp if constantly exposed to steam and splashing
- Non-porous options like quartz and porcelain tile handle humidity with little to no extra maintenance
Bathrooms with poor ventilation or frequent hot showers see this problem the fastest, since trapped humidity gives moisture more time to interact with the backsplash material.
Avoiding these three mistakes largely comes down to planning ahead — measuring correctly, viewing materials together rather than in isolation, and choosing something built to handle daily moisture. This same planning mindset applies to the rest of the vanity as well, including cabinet material and hardware finish, since a bathroom that’s planned as one cohesive system tends to age far better than one built decision by decision.
Bringing It All Together — Small Detail, Big Impact
A bathroom vanity backsplash rarely gets the spotlight during a remodel, yet it quietly does some of the hardest work in the room. The right material, height, and color choice can protect your walls for years while tying the whole space together.
Next time you’re planning a bathroom update, take a moment to look at that small strip of wall behind your sink — it might deserve more thought than you’ve given it.
FAQs
Should a bathroom vanity have a backsplash?
Yes, in most cases. A backsplash protects the wall behind your sink from daily water splashes, soap residue, and moisture damage, which helps avoid stains, mold, and repainting down the line.
What are some good backsplash options for a bathroom vanity?
Porcelain tile, quartz, marble, and laminate are the most popular choices. Porcelain and quartz work best for daily use since they resist water and stains, while marble suits lower-traffic bathrooms and laminate fits tighter budgets.
What can I use instead of a backsplash in a bathroom vanity?
Some homeowners use a peel-and-stick tile sheet, a painted waterproof sealant, or extend the countertop material itself up the wall instead of a traditional tile backsplash. These still offer some protection but generally don’t perform as well as a dedicated backsplash.
What is the new trend in backsplash?
Full-height slab backsplashes made from quartz or marble are trending, especially the seamless “waterfall” look where the countertop material runs straight up the wall with no grout lines.
What backsplash never goes out of style?
A simple white or neutral subway tile stays timeless. It pairs with almost any countertop or cabinet color, making it an easy long-term choice that rarely needs updating.
What are some popular backsplash ideas for 2026?
Large-format porcelain tile, quartz slab backsplashes, and warm neutral stone tones are leading the trend list. Textured tile in soft, earthy colours is also gaining popularity over bold, high-contrast patterns.
What are some good ideas for a small bathroom backsplash?
Light-coloured tile, glass tile, or a standard 4-inch backsplash work best in small spaces. These keep the wall feeling open instead of visually cluttered, which matters more in compact powder rooms.
What are common backsplash mistakes?
The most frequent mistakes are choosing a height that’s too short for the faucet, picking a material that clashes with the countertop, and overlooking humidity resistance in materials like unsealed stone or laminate.
Pingback: Two Separate Vanities Kitty Corner: A Simple Layout Guide
Pingback: Farm Sink Bathroom Vanity: Complete Guide